home decor
Showing posts with label home decor. Show all posts

Easy Dollar Store Patriotic Decor

Tuesday, April 21, 2020

No comments
Patriotic decor is one of my favorites! I mean the Red the White the Blue, the love for my country! What's not to love? One such decoration is this simple and affordable table piece.


I was able to pick up all of these items at my local Dollar Tree.


Super easy, cut ribbon to size of vase rim and hot glue. Place pinwheel in the vase and drop the stars around it. That's it! Ta-done!!! I told you that was easy! 

The pinwheel will actually spin inside the vase so how fun would these be as table centerpieces at your outdoor Fourth of July or other patriotic celebrations? As the breeze comes along it just might spin the pinwheel!
Read More

Thrifted Art Makeover

Wednesday, September 11, 2019

2 comments
Hey y'all, still here and still love thrifting! Today I want to share my thrifted art, makeover. I actually picked this up a really long time ago (so long ago) because I LOVED the frame. It's pretty right? The art is nice but I wasn't in love with it, a bit drab for my taste.


My bathroom is beach theme so I wanted to add some ocean here. I took the art out of the frame. It was just a lightweight board and I painted right over the existing art in shades of blue and tan. 


 Psalm 93:4 is one that I love and I wanted to add it to my beach theme bathroom. I took some 2-inch vinyl letters and cut them out. I laid them out till I was happy with the layout and marked it for placement.


I drew the guide lines (in pencil so I could erase later). The little lines mark where the first letter begins and the long line marks bottom alignment for each letter.


 Then I peeled the backs of each letter and carefully stuck them on and then erased the pencil lines.


Next, I painted over the entire thing, letters and all in a color of my choice. I did 2 coats.


Before it was fully dry I removed the vinyl letters one by one.


And here's what I was left with!


I wanted it a bit worn and shabby so I lightly sanded the entire thing.

 
I popped it back it the frame and ta-done! 
I love it and now I don't want to hide it away in my bathroom! The frame colors matched perfectly with my beach theme however if needed you could paint the frame too.


These are the vinyl letters I used. I actually had to get more because I ran out of certain letters which explains the two different types. These were from Target...


...and the Dollar Tree. 
I can't really recommend one over the other as they both worked well, the Dollar Tree ones however had quite a bit less in the pack.


So there you have it! Whatcha think?

Read More

Wine Cork Shadow Box

Monday, April 8, 2019

1 comment

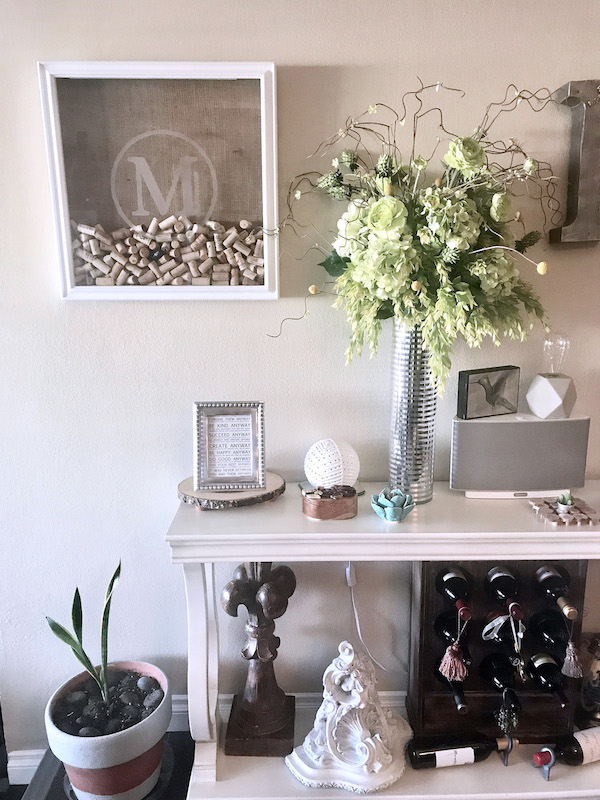
You see the wine cork shadow box on the left? This beautiful piece was created from a thrift store picture frame. It was a gift for my sis in law. She sent me this picture to use so you can see how it's sitting pretty in her lovely home!

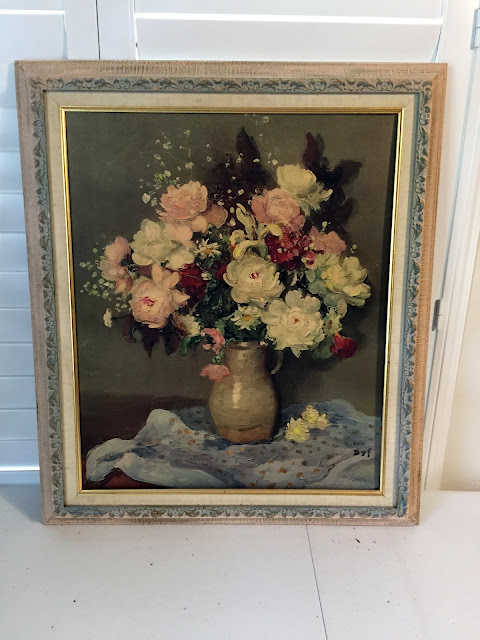
Below is the picture I picked up at the thrift store. You can use many sizes of frames for this project just pick the size you like or what fits your needs.

You need some basic wood cutting and nailing skills or at least be able to figure that out. Basically, all you do is build a box the size of your frame with 1x2 boards. 

Glue burlap or whatever backing you like to a flat backer board. And sandwich them all together. I nailed them all together so there's no getting it apart and no getting the corks out.

The trickiest part is getting the glass to stay in place. I'm sure you can glue it or caulk it and that might be easier and actually look better. In fact, if I make another I might try that. On this one, I glued very thin trim pieces to hold the glass. You can kind of see one in the photo below.  

Before putting all together and before painting, drill a hole large enough to fit a cork, in the center of the board that will be on top.

Corks drop right through the hole and land where they will! I dropped just a few to make sure it worked.

For the glass decoration, you can do a pretty vinyl piece and that's it. I know tons of you have handy vinyl cutters! I had my friend make the circle and the M (last name initial) on her Cricut and I used the negative space from it (you know that parts that you usually weed out and toss) to etch the glass with a product from the craft store called Armour Etch.

This project turned out great and I was very happy with the outcome.

You really can make these to hold any small objects. Legos or small toys would look neat inside! Or seashells would be pretty! What would you put inside?


Read More

Giant Sand Dollar (DIY)

Wednesday, February 20, 2019

9 comments
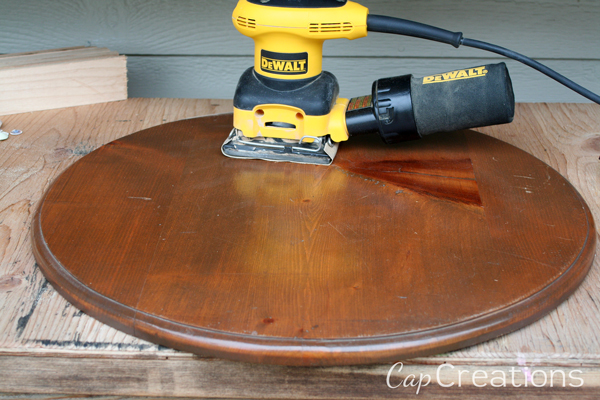
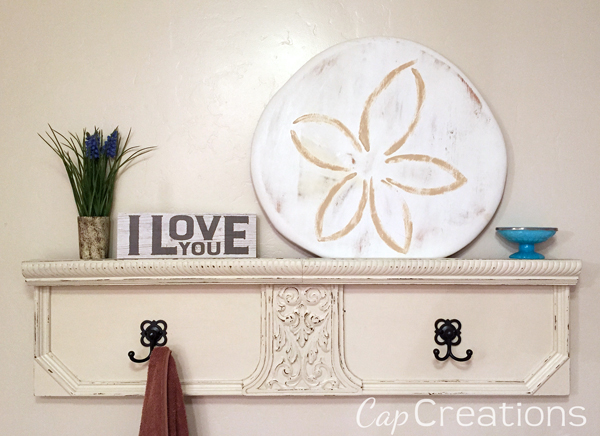
I first saw this over at Thrifty and Chic many years ago and knew I wanted to make one and I had just the piece! We've been holding on to this table top for a long time, my husband actually made it in high school woodshop! Whoa, that's old lol!!!


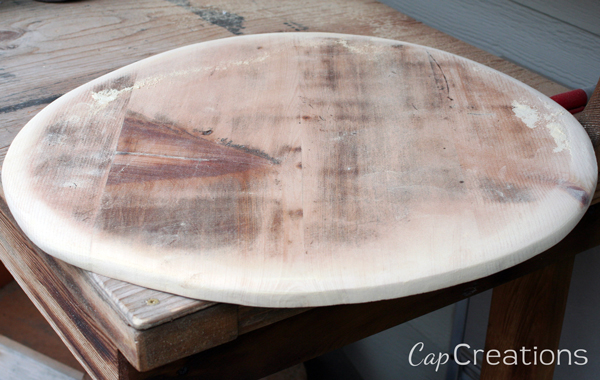
I thought I would be able to do this with just a small hand sander but decided to use our scroll saw to make some cuts to the edges and get our overall shape and remove some of the bulk. The photo below is after my husband had done plenty of sanding for me.


Sorry I don't have any painting photos but here's what it looked like right before painting.


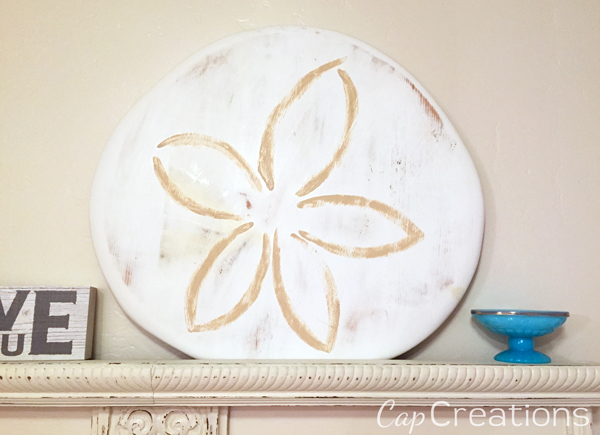
I simply painted it white and let dry. I then lightly free handed in pencil first and then used a tan color for the sand dollar details.


I also gave it a quick sanding to make it look a bit rustic and worn. These last two photos are my new sand dollar in my bathroom. The lighting isn't the greatest as that room has no windows but I love how my giant sand dollar came out!


Read More

Happy 4th! & A Discount Code

Wednesday, July 3, 2013

1 comment
Howdy and happy 4th of July! I know it's been awhile. I've just been livin' life. It's cRaZy how fast time goes by right?

So...I've got a discount code below but first I have to share the flags my boys and I made in honor of the 4th of July.


Don't you just love them? I do! I told the boys wow they look like something you would buy at Target in the home decor section. We made these beauties out of stir sticks! Yep the big 5 gallon ones you get at the hardware store. We just cut them down to size, painted, glued and lastly antiqued. I think they might be on display the whole year cause I love them so much!
 
To celebrate I have a discount code good for 15% off your entire purchase at Cap Creations. Use code HAPPY4TH at checkout! Good through July 5th.
 
Have a great and safe Holiday my friends! Don't get too crazy with those fireworks!
Read More

Fall / Pumpkin Wreath

Monday, October 22, 2012

1 comment
I want to share this fairly easy and inexpensive pumpkin wreath. William Sonoma sells a beautiful pumpkin wreath and it was my inspiration. Depending on how much you want to spend, you can make yours fuller. William Sonoma sells theirs for $99.95! I spent $7 to make mine, though I did already have some stuff on hand that I did not have to buy.


Supplies:
• Wreath - Had mine on hand, these can be picked up at dollar stores.
• Spanish Moss - 2 bags minimum, Dollar Tree.
• Small Styrofoam Pumpkins - 99 cent only store, each one will be cut to make 2.
• Small Twigs/Sticks
• Utility Knife/Box Cutter Knife
• Glue Gun & Glue Sticks
Note: Keep in mind the size of your wreath will determine how much supplies you will actually need. My wreath was about 18 inches.


Prepare the pumpkins by cutting each one in half with the utility knife as pictured below. This allows the top and bottom to be used.


I did not like the original stems, I pulled them out and hot glued in some small sticks. The Pumpkins that were the base sides had no stems and I just left them that way. Set all pumpkins aside for now.

Place your wreath down and layout the spanish moss to your desired thickness. I used 2 (Dollar Tree) bags for my 18 inch wreath. You may want to do this on some newspaper or something, the moss is pretty messy while you are arranging it. (I did mine out side.)

Working in small areas at a time pull back some moss and add lots of hot glue (all over the wreath) and firmly press the moss back into place making sure to not get burned! Work your way around the entire wreath in this manner.

You will have a wreath that is entirely covered with spanish moss. You will now want to layout your pumpkins to your liking. I staggered mine. I tried straight evenly spaced out pumpkins and did not like it. I'm just not symmetrical!

Once you have them arranged to your liking, simply start gluing them all into place with lots of hot glue.


If you'd like to add a ribbon you can, or embellish it any other way you please. I think it would look lovely with many more pumpkins added in, even different sizes but never went back for more.

Here's a peek of it on my door. It is so hard to get into fall around here since we've still been having hot 97 degree summer weather. Today and yesterday have been pretty nice though. Our trees are confused, they don't know that it's fall and they are supposed to be all kinds of  lovely shades of fall.

Hope you are enjoying your fall!
Read More

DIY Canvas Print With Free Printable

Monday, August 15, 2011

4 comments
Love the look of canvas prints but not the price? Yeah, you can get a good deal on a canvas print sometimes but usually, they are pretty pricey. You can create a canvas look for a fraction of the cost. And it's very easy. Here's how I did it!

Supplies:
• 8x10 Canvas (craft store, Walmart, big lots has them too)  You can pick these up for $2 or less!
• 8x10 Photo/Print printed at a photo lab. (Costco is the best!)
• Paint Brush
• Paint to match your print.
• Mod Podge
• Scissors or Paper Cutter

Let's get started, shall we? If you'd like to use our print you can get it HERE. Don't have a photo of this step but trim your 8x10 print to fit your canvas. It's not much, just enough so your photo will not hang over the edges of your canvas.

Paint around the entire edge/sides of your canvas. Go ahead and cover just a tiny bit of the top edges too. I give mine 2 coats for good coverage. Let dry.

Once the paint has dried add a layer of Mod Podge to the entire surface of the canvas and stick on the 8x10 print/photo. Basically, you're gluing it on.

It should now look like this.

Next, cover the entire photo with Mod Podge. Also, be sure to cover the sides that were painted earlier. (Try not to be jealous of my lovely manicure hehe!)

Here's a close up for some detail. You will see the brush strokes when it dries. I personally like them, makes it look like maybe the canvas really is painted. But if that's not your thing smooth them out as much as possible. Let dry and use your best judgment as to whether or not you need a second coat of Mod Podge.

Let dry and display as you please. Looks great on an end table or hang on a wall.

For our who can I bless canvas, I think somewhere you'll see each day when you leave home is perfect. Like a simple last-minute reminder as you're stepping out the door!

What do you think? Easy right? Don't forget you can snag our who can I bless today print HERE. This printable was created with products from Michelle Underwood Designs.

If you have any 8x10 printables you'd like to share with us please leave the link to it in the comments! Thanks for reading. Let me know if you have any questions.
Read More

DIY Cheese Dome to Button {Wall Decor}

Monday, July 11, 2011

28 comments
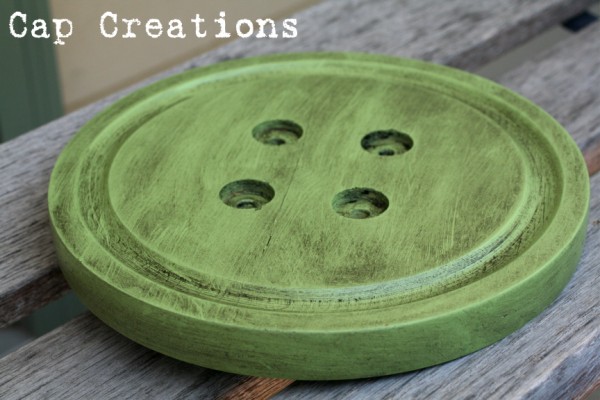
Button button who's got the button? - Willy Wonka  Oh wait a minute! I do! lol! This is a fun and simple project with the most adorable outcome.

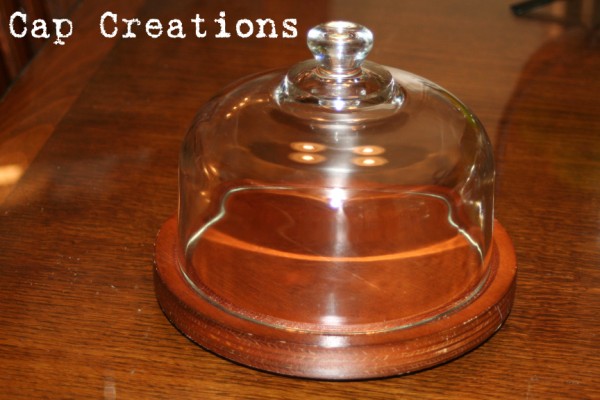
I picked up this cheese dome at a thrift shop. Cause life is just not complete without a trip to the thrift shop! Ya know what I mean?

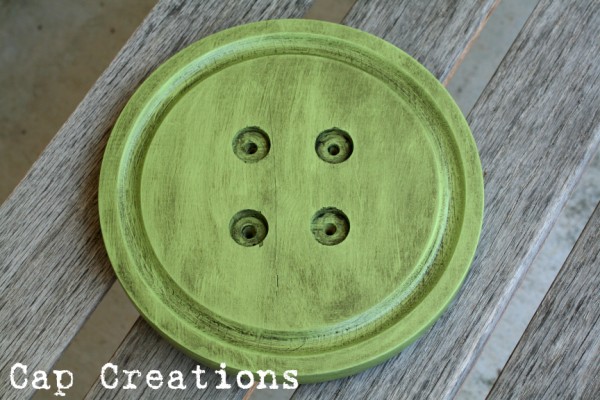
I removed the dome and the small rubber feet off the bottom, which were held on with 3 tiny screws. I then marked 4 spots on the front center area for holes. My husband helped me with this next part BUT it was very simple and you could do it yourself. He was offering to help so why not? Using a circle drill bit drill 4 small holes like a button. Then paint!


How cute! I added some antiquing and a small sawtooth hanger to the backside. It's the perfect little wall decor for any craft or sewing room! Also looks adorable on a small easel. I am temped to add some x shape string (shoestring, rope ???) to the holes to look like thread! Yeah, no, what do you think?

Come back soon to see my inspiration for this project. And soon I'll share what I do with the top glass part of this cheese dome!

Have you entered our current giveaway? Click HERE to enter now!

Linking to:
Southern Hospitality

S- The DIY Showoff, Under the Table and Dreaming, M - The Girl Creative, MM Party at BNOTP, Making the World Cuter, Skip to my Lou, Sumo's Sweet Stuff, Keeping it Simple, T- Coastal Charm, Tip Junkie, All Thingz Related, Today's Creative Blog, Hope Studios W- Trendy Treehouse, Blue Cricket Design, Me and My Bucket, Someday Crafts, My Backyard Eden, Room to Inspire, Creations by Kara, Just a Girl, T- Yesterday on Tuesday, The Shabby Chic Cottage, Life as Lori, Somewhat Simple, Beyond the Picket Fence, Tidy Mom, Fireflies and Jellybeans, F- A Few of My Favorite Things, It's FUN to Craft, The Shabby Nest, Fingerprints on the Fridge, Tatertots and Jello, Funky Junk Interiors, S- Along for the Ride, I Heart Naptime
Read More