diy valentine
Showing posts with label diy valentine. Show all posts

Printable Valentine Cards Freebie

Tuesday, January 21, 2020

No comments
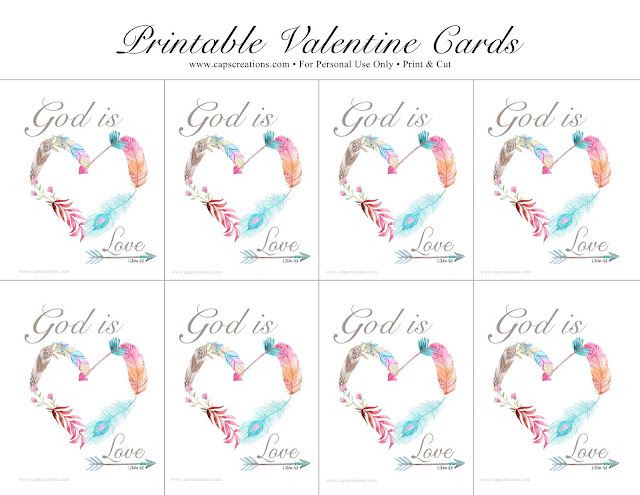
Pretty and adorable Valentine Cards to go with our free Valentine printable. Simply download, print and cut! You can use them as Valentine cards to pass out to everyone you know. They also make a great hang tag for your Valentine gifts. You can attach a little heart candy in the center if you like to make them extra special!

Click on the image below to download your free Valentine's Cards. Enjoy!

Read More

Prayer Rock Poem Printable

Saturday, February 7, 2015

No comments
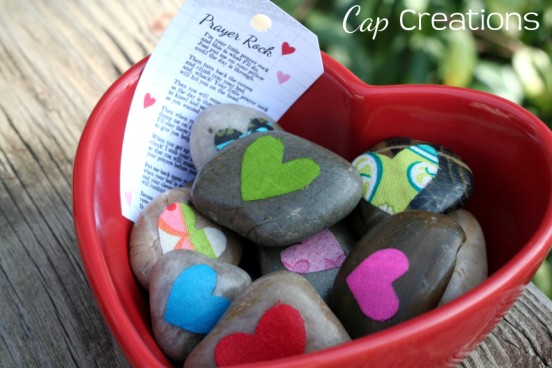
Remember our Prayer Rocks?
http://blog.capscreations.com/2012/02/prayer-rock-valentine.html
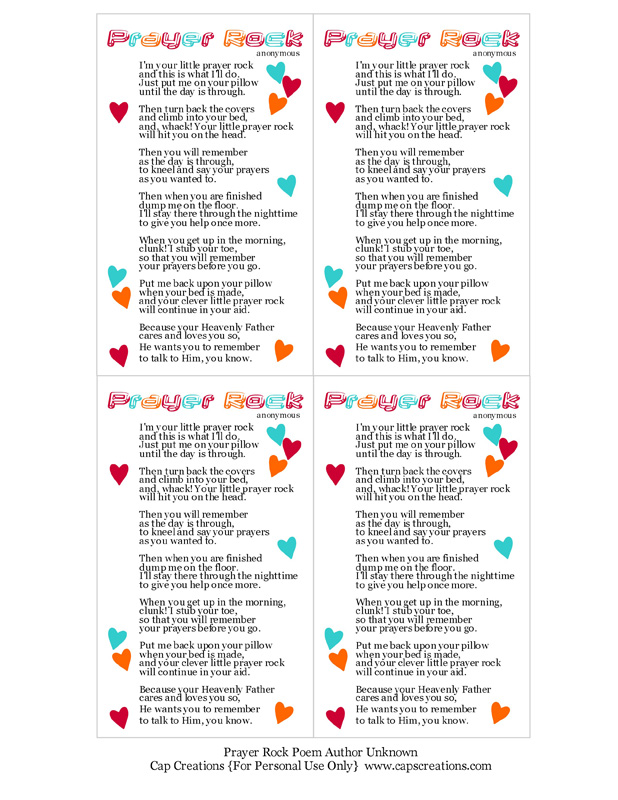
Here below is another free printable poem to go with them. Use these as bookmarks, tags or what ever, to go with your prayer rock. These make great little gifts too!
Click HERE to print. Enjoy!
http://www.capscreations.com/prayerrock2.pdf

Read More

Lego Heart Necklce Valentine with Printable

Monday, February 2, 2015

3 comments
Yay my beloved February, you made it! In honor of Valentine's Day and my favorite month February, I have a great Valentine and free printable to share with you.

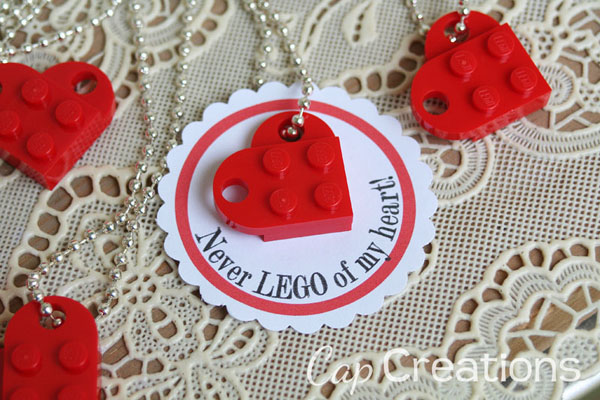
I don't know about y'all but my boys absolutely love Legos. A Lego theme Valentine for their classmates seemed fitting. These Lego heart necklaces are easy and fun to make.


 You need 2 Lego Coupling plates (part #4188189) per heart. These plates are about 20 cents each and can only be ordered by phone directly through Lego by calling 1-800-835-4386 (US or Canada) or 1-860-749-0706 (outside US or Canada).

You also need a chain or ribbon or whatever you want to use to make the necklace part.

Print out our free printable circles (below) on cardstock. Punch them out with a jumbo circle puncher. Punch a small hole for the chain to go trough (in the proper spot of course) and attach the paper circle and heart to the chain or ribbon. Write the to and from on the back side.

That's it, now you have a fun little Valentine!
You can download and print our free printable Lego Valentine by clicking HERE.

DIY Show Off, By Stephanie Lynn, Coastal Charm, Tip Junkie, I Heart Naptime,
The Shabby Nest,
Read More

Adorable DIY Valentine Bubbles

Monday, February 4, 2013

5 comments
Hey guys, I've got a cute little craft to share with y'all! These adorable diy Valentine bubbles with heart bubble wands.

These are super easy to make and a big hit!
What you need:
baby food jars
spray paint
thick craft wire
bubbles
fabric
wooden tags (optional)
letter stamps and StazOn ink pad or permanent marker (optional)

From the baby food jars remove the labels and baby food of course, wash and dry. Spray paint the lids in the color of your choice.

So here we go, a step by step in pictures of how to make the heart shape wand. I suggest playing around with the length of wire until you get the size of wand you want to end up with. Mine was about 8 or 9 inches to start.
 Fold in half upward.
 Bend back downward and start forming a heart shape.
 Cross ends to make a complete heart shape.
 Twist and bend ends downward leaving a bit on each end untwisted.
 Roll the ends upward into themselves making a coil like end.
Ta-da!!! An adorable little bubble wand! Cute right? You know you want one! ;)

Simply fill your jar up with bubbles then add a wand and the lid. Use store bought bubbles or bubble recipe to be found at Under the Sycamore. To decorate cut strips of fabric with pinking shears to limit fraying and tie on to the jar like a ribbon. You could use regular ribbon too. I also tied on a heart shaped wooden tag on which I stamped bubbles. Instead of stamping the hearts you could write them out with permanate marker as well.

Now aren't these just adorable??? You can also play around with the color of lid and ribbon and shape/color of wand for birthdays!!! Just remember they are glass so adult supervision while small children are playing with.


Read More

Prayer Rock Valentine

Monday, February 6, 2012

4 comments
Shared this over at Worthy of the Prize for their Hope for the Home series but thought I'd share it here too!

Have you ever heard of a prayer rock? The idea is simple. You place this little rock on your pillow each morning so that when you go to bed that night you are reminded to say your prayers. Then when going to bed you place it on the floor so you are reminded to say your morning prayers when you wake. This is also great for training your children to remember their morning and nighttime prayers.


These are so simple and fun to make. Here's how. Oh and be sure to get the kiddos help they love making these!

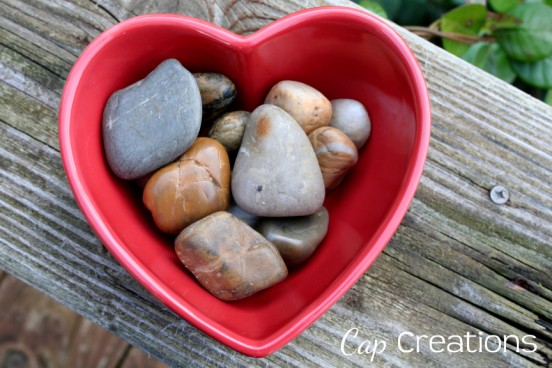
Gather some rocks. I had these on hand that I got at the Dollar Tree. 


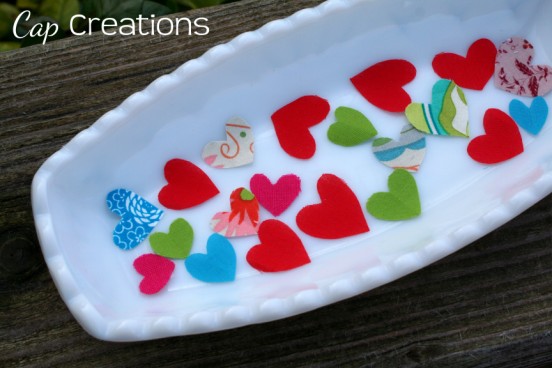
Cut out small heart shapes using some of your favorite fabrics. This is a fantastic use for even the tiniest of scraps. 


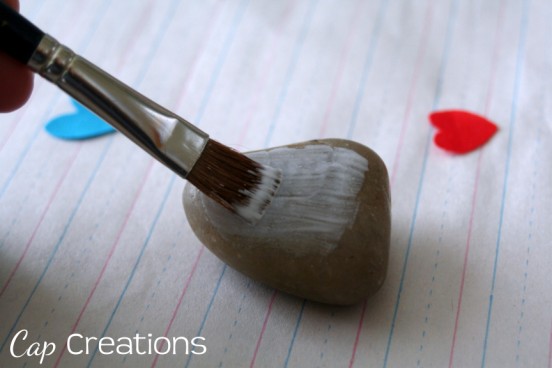
On a smooth clean side of your rock, brush on a coat of mod podge.

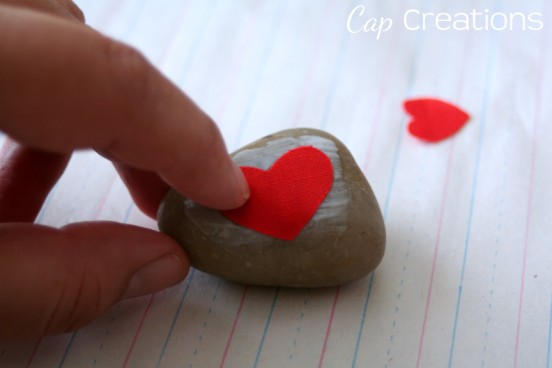
Add a fabric heart.

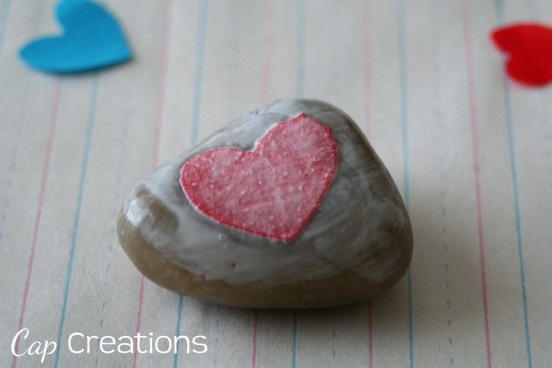
Brush on another coat of mod podge, right over the fabric heart. You'll want to get good coverage over the fabric to ensure a good attachment. Now do several and let them dry and you are done!

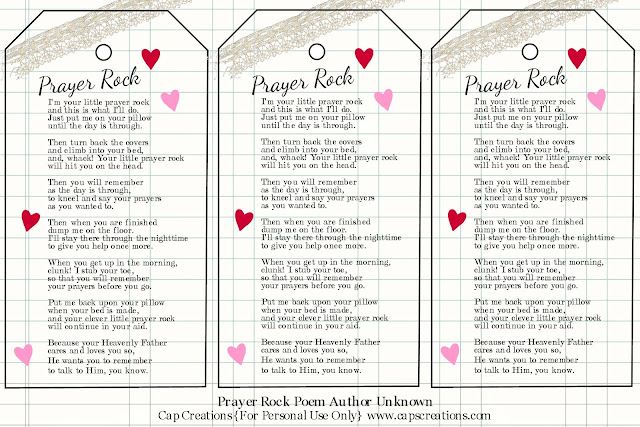
Now my kid is a rock fanatic so these are going to be his Valentines to his classmates this year. I made a tag with the prayer rock poem and we will package it up like one of the options below. You can snag the tags below too!

Use letter stamps to stamp "You Rock" on a muslin bag and tie on the tag. You can also stamp the to and from on the back of the tag. The complete letter stamp sets can be found in the dollar bins at Michaels.

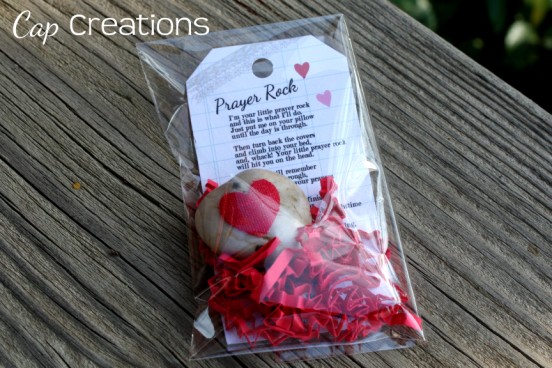
Add the tag, basket filler paper, and the rock to a cello bag and close. Again you can stamp the to and from on the back of the tag.

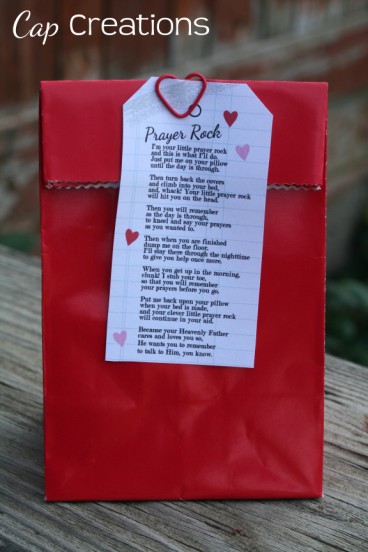
Simply drop the rock into a red bag, fold the top over and attach the tag with a heart paper clip.

If not using for a Valentine, how great would these be in an entryway, you can let your guests grab one as they go.


Here is another fun kid friendly printable poem for ya! Click HERE to get it.

Read More

Classmate Valentine Printable

Monday, January 23, 2012

No comments
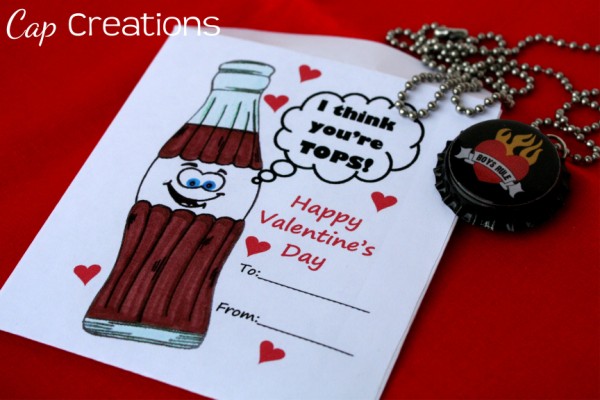
Here's a fantastic idea for a valentine for your kiddo's classmates! This adorable pop bottle was illustrated by my wonderful husband. I took his drawing and transformed it into a Valentine envelope that reads "I think you're tops!" and "Happy Valentine's Day". And a to and from for you to fill in.

It's perfect for stuffing with a bottle cap necklace or bottle cap magnet. Which by the way we have a tutorial for each! Necklace here and magnet here. (We make it so easy on you.)
We did these last year for my son's 1st-grade class and they were an absolute hit! Classmates got the necklace and teacher the magnets. And everyone loved them!

To Make:
Print our Valentine envelope HERE.
Print on regular 8.5x11 paper.
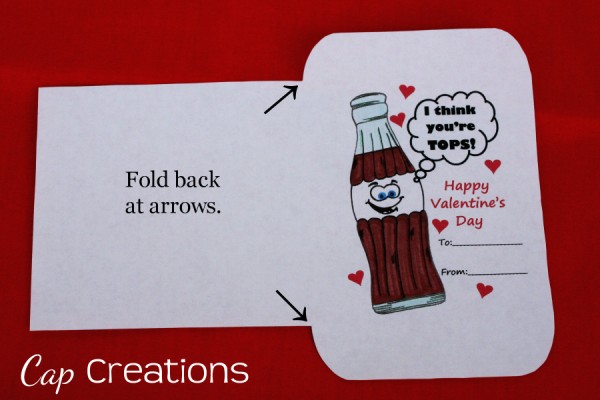
Cut around the edge. Cut inside the outline so that no black is left.
Next, you need to fold back the big tab where the arrows show below.

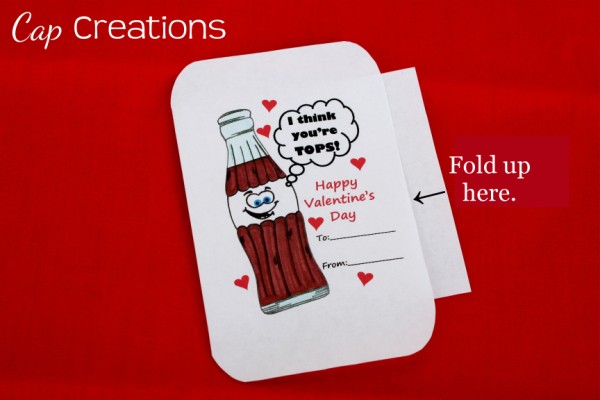
You will now have something that looks like the photo below. Fold the flap that sticks out, upward. Again where the arrow is showing in the photo below.
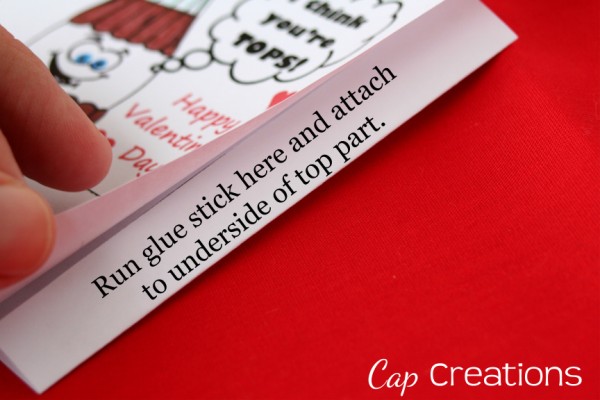
Now you have this. Tuck that flap under the top layer.

Run a glue stick across the under flap and attach to top layer.
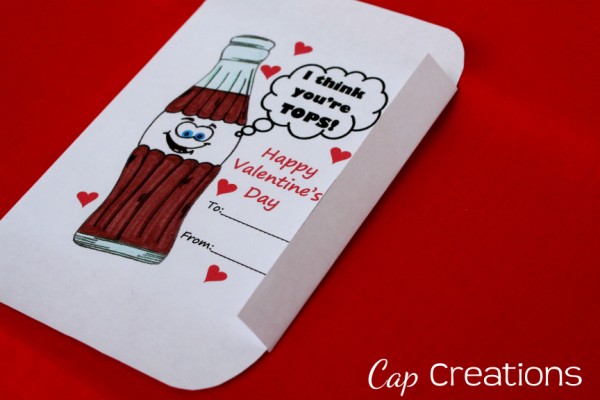
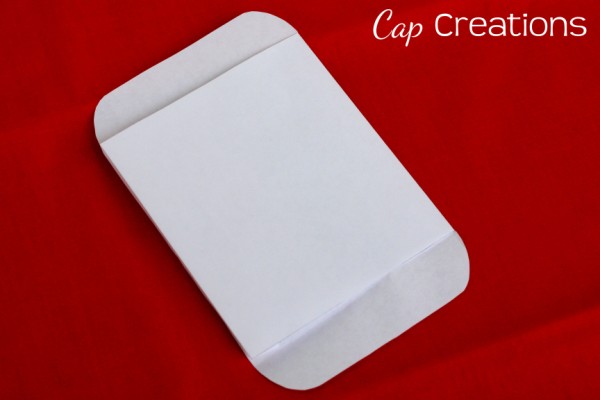
When you flip it over it should look like this.
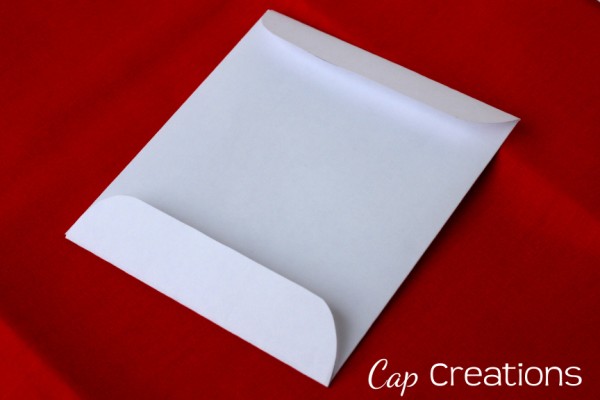
Simply fold the top and bottom flaps. Add glue stick to the bottom flap and leave the top open for stuffing.
You can either glue stick the top after stuffing or use a cute Valentine sticker to close that flap.

Now go check out our bottle cap necklace tutorial and bottle cap magnet tutorial to complete your Valentine. These are sure to be a hit!
The bottle cap in our photo was done with our inkjet printer using the same method as our magnet tutorial. That bottle cap art in the photo by Sincerely Susan.
Read More

Potato Stamp - How To

Monday, February 7, 2011

9 comments
One of the activities on our Valentine Countdown Cards is to make potato stamps, then use those stamps to create Valentine cards. I am SURE most all of you know how to do this but thought I'd share how we do it.

Cut a large potato in half.
Take whatever shape cookie cutter you want to use and push it into the potato. Cookie cutter should be smaller than the potato.
With cookie cutter still in place carefully cut around the potato. Keeping the cookie cutter in place will protect your shape from getting cut off.
 Remove area that you cut.
 Remove cookie cutter and carefully cut away/peel potato that is near the shape. Round and smooth the edges.
 Add paint and stamp!
Stamp away!!

Have you done any of the Valentine Countdown Activity Cards? We also had lots of fun planting the seeds! The boys were totally into it!
Read More

Valentine Countdown Activity Cards {Download}

Wednesday, February 2, 2011

No comments

Hello! Today I have the activity cards to go with yesterday's countdown envelopes. There are a couple of extra cards in there so you have a bit of a selection. Download and print in a 4x6 size to be sure they fit in your envelopes. You could have them printed at a photo lab if you like that type of finish or I also suggest using card-stock.


If you missed the envelopes yesterday get them HERE.
Enjoy! I'd love to know if you use them.
SaveSave
Read More

Valentine Countdown {Download/Printable}

Tuesday, February 1, 2011

11 comments
With Valentine's Day just around the corner what better way to teach your children (or remind yourself) about love? I've created this Valentine Countdown for my kiddos and thought I'd share with you!
 Lovely numbered envelopes perfect for stuffing
 perfect for counting down
 until one more day til Valentine's Day!
What's even more special is what's inside. Sure we've got treats and love notes, but every other day there is an activity or thing to do that deals with love and a bible verse that pertains to it.

We hung ours on a line with clothes pins but you could just as easily put them in a bowl or where ever!

The envelopes will need to be printed and cut and glued. It's pretty basic but if you need help please ask. To get red and white like pictured above print out 2 sets of envelopes, one set on red paper and one set on white. These download in a zip file that you will have to extract after downloading.


The card on the right is designed with a spot to attach a small candy (heart marks the spot). Print it as a 4x6.


Special thank you to The Graphics Fairy for the frame images on the envelopes! Enjoy!

Linking up at: The Idea Room
S- The DIY Showoff, Under the Table and Dreaming, MThe Girl Creative, Mom 2 Mom, MM Party at BNOTP, Making the World Cuter, Skip to my Lou, Sumo's Sweet Stuff, Keeping it SimpleT- Coastal Charm, All Thingz Related, Today's Creative Blog, Hope Studios W- Trendy Treehouse, Blue Cricket Design, Me and My Bucket, Someday Crafts, My Backyard Eden, Room to Inspire, Creations by Kara, Just a Girl, T- The Shabby Chic Cottage, Life as Lori, Somewhat Simple, Beyond the Picket Fence, Fireflies and JellybeansF- A Few of My Favorite Things, It's FUN to Craft, The Shabby Nest, Fingerprints on the Fridge, Tatertots and Jello, Funky Junk InteriorsS- Along for the Ride, I Heart Naptime
Read More