bottle cap magnets
Showing posts with label bottle cap magnets. Show all posts

Mustache Bottle Cap Magnets

Monday, May 14, 2012

1 comment
Do you remember the Bottle Cap Magnet Tutorial? Well, I recently made some pretty dang awesome mustache magnets for my friend's birthday.  She's one of those friends, you know the ones you hold on to. ;) I've known her since elementary school.


You can get the mustache bottle cap art at Oh My Craft Supply! It's 4x6 and includes 12 mustaches.  
Read More

Classmate Valentine Printable

Monday, January 23, 2012

No comments
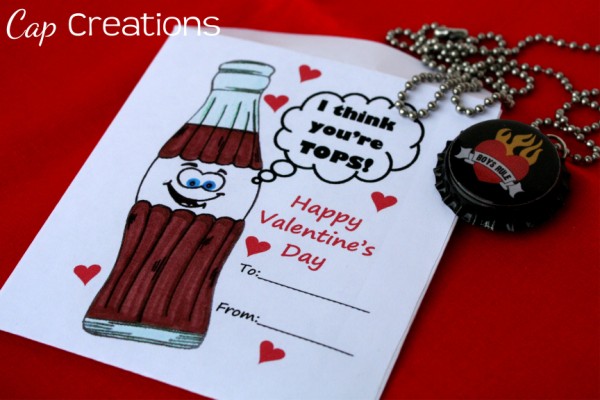
Here's a fantastic idea for a valentine for your kiddo's classmates! This adorable pop bottle was illustrated by my wonderful husband. I took his drawing and transformed it into a Valentine envelope that reads "I think you're tops!" and "Happy Valentine's Day". And a to and from for you to fill in.

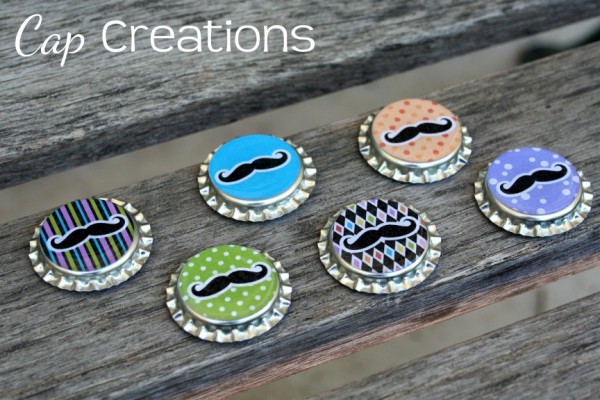
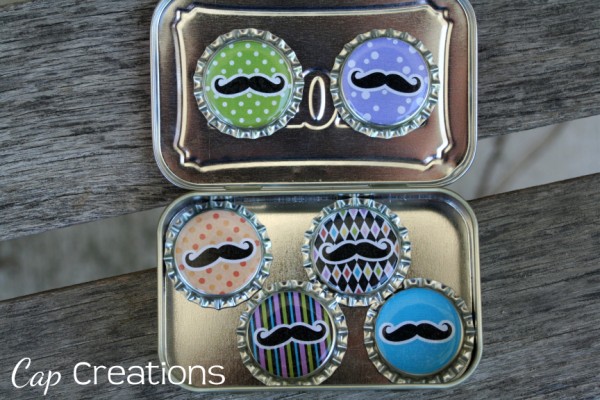
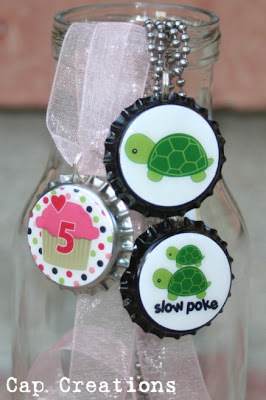
It's perfect for stuffing with a bottle cap necklace or bottle cap magnet. Which by the way we have a tutorial for each! Necklace here and magnet here. (We make it so easy on you.)
We did these last year for my son's 1st-grade class and they were an absolute hit! Classmates got the necklace and teacher the magnets. And everyone loved them!

To Make:
Print our Valentine envelope HERE.
Print on regular 8.5x11 paper.
Cut around the edge. Cut inside the outline so that no black is left.
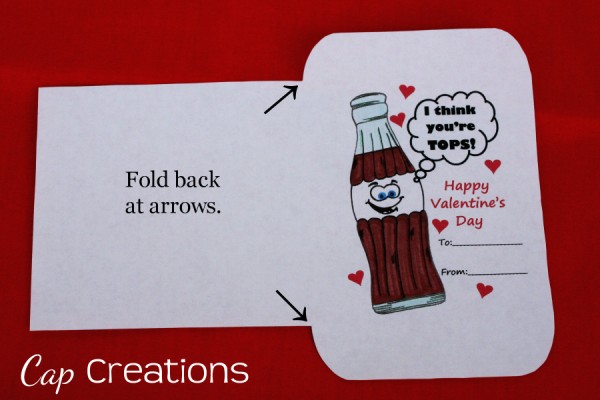
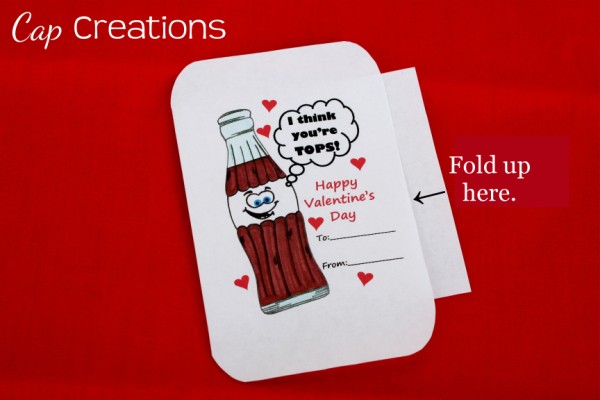
Next, you need to fold back the big tab where the arrows show below.

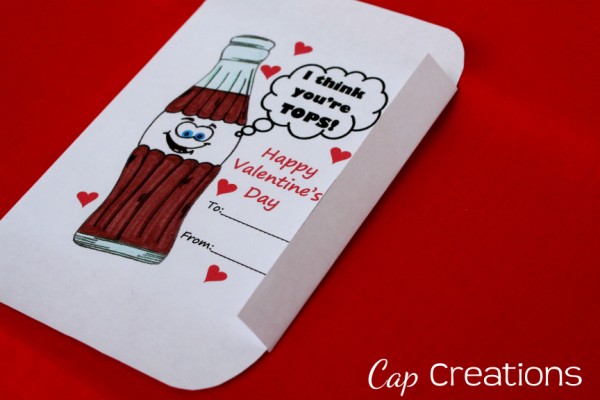
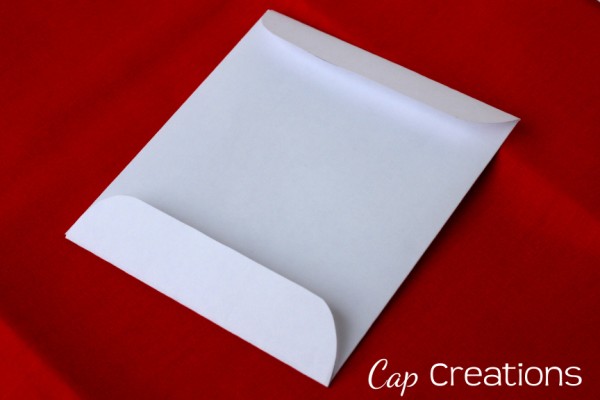
You will now have something that looks like the photo below. Fold the flap that sticks out, upward. Again where the arrow is showing in the photo below.
Now you have this. Tuck that flap under the top layer.

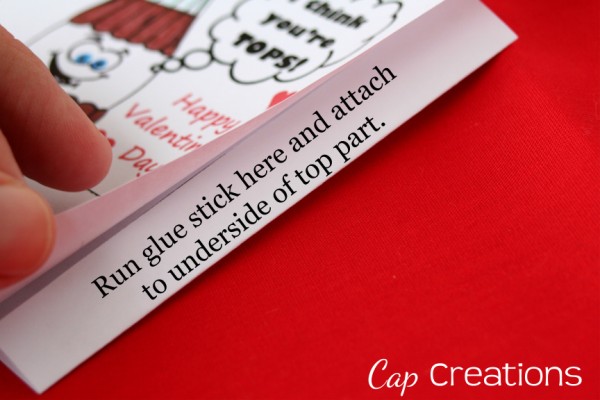
Run a glue stick across the under flap and attach to top layer.
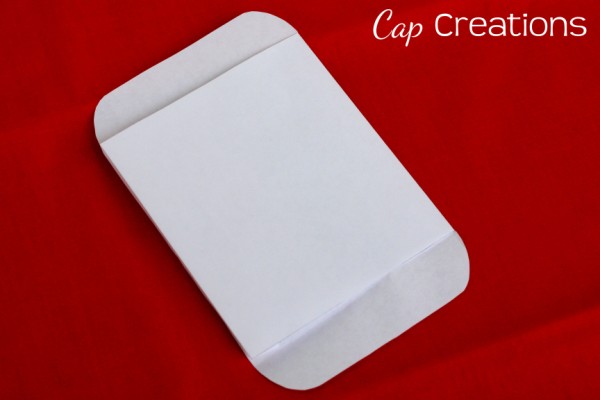
When you flip it over it should look like this.
Simply fold the top and bottom flaps. Add glue stick to the bottom flap and leave the top open for stuffing.
You can either glue stick the top after stuffing or use a cute Valentine sticker to close that flap.

Now go check out our bottle cap necklace tutorial and bottle cap magnet tutorial to complete your Valentine. These are sure to be a hit!
The bottle cap in our photo was done with our inkjet printer using the same method as our magnet tutorial. That bottle cap art in the photo by Sincerely Susan.
Read More

Bottle Cap Art Freebie

Friday, September 2, 2011

No comments
Hey friends I wanted to share this with you. Blessed by Designs is starting a thing where they offer a new freebie item each month! For this first month you can snag this Pink Zebra Print bottle cap art. Includes all letters A-Z and 4 blanks so you can personalize yourself!

This freebie goes along perfectly with our

Or our

Go get your freebie at Blessed by Designs!

Have a great weekend friends!
Read More

Bottle Cap Magnet Tutorial

Monday, September 6, 2010

26 comments
Thanks for all the great comments on last week's Bottle Cap Necklace tutorial! Remember I said I would also post a bottle cap magnet tutorial? Well, here it is!


Art for this tutorial needs to fit in a 1-inch circle. It can be printed on an ink-jet printer although I highly recommend using a photo lab as the image will be much clearer. Thank you Sincerely Susan Designs for donating the bottle cap art for this tutorial. 

Materials:

Bottle Caps

Rubber Mallet

Bottle Cap Art

1 Inch Circle Puncher

1 Inch Page Pebbles

Glue Stick

E-6000 Adhesive

Magnets

Place bottle cap on a hard surface (concrete works best for me) and lightly tap it with the rubber mallet to flatten it a bit. Tap turn, tap turn until you get it sorta even.

As you can see in the photo below, the one on the right has been flattened just a bit.

We do this so when the magnet is attached to the back it will extend beyond the edges of the cap like photo below. Don't want bottle caps scratching up any refrigerators! Yikes!

Use a 1 inch circle punch to punch out your bottle cap art.

Once punched out, place a page pebble over the front of the cap art. These stick on like a sticker.

Peel off the back layer of the photo lab paper. (For some reason I have it in my head that it will glue better to that surface rather than the slick backside of photo paper. Don't know if that's true.) Skip the step if using regular paper.

Apply glue from glue stick to the backside of your cap art.

Stick art to the bottle cap and apply pressure for a few seconds.

Place a dab of E-6000 to the backside of the bottle cap.

Attach magnet.

And you are done my friends!

How cool are these?!

Made these adorable owls too. Also from Sincerely Susan Designs.

Don't know if you can tell in this photo or not but the owls were printed on an inkjet printer and they are just not as clear. The page pebbles seem to magnify things too, really making those pixels stand out. Highly recommend using a photo lab for your art.


Linking up at:
S- The DIY Showoff, Under the Table and Dreaming, MThe Girl Creative, MM Party at BNOTP, Making the World Cuter, Sumo's Sweet Stuff, Keeping it SimpleT- Coastal Charm, All Thingz Related, Today's Creative Blog, Hope Studios W- Trendy Treehouse, Blue Cricket Design, Life in the Pitts, Me and My Bucket, Someday Crafts, My Backyard Eden, Room to Inspire, Creations by Kara, Just a Girl, T- The Shabby Chic Cottage, Life as Lori, Somewhat Simple, Beyond the Picket Fence, Fireflies and JellybeansF- A Few of My Favorite Things, It's FUN to Craft, The Shabby Nest, Fingerprints on the Fridge, Tatertots and Jello, Funky Junk InteriorsS- Along for the Ride, I Heart Naptime
Read More