I'm Mandy from Little Birdie Secrets and I am so excited to be part of the Pillow Fight for a Cause! Every time I take my kids with me to the fabric store they try to convince me to buy more fabric for another pillowcase. And it usually works. The problem is that they're so easy and fun to make! This is a simple pillowcase tutorial that will give you tons of options for the pillowcase you're going to donate to Carlee's cause! Enjoy!
This quick and easy pillowcase makes kids want to go to bed at night! Cotton or flannel fabrics work well. You will need three coordinating fabrics. One for the body of the pillowcase, one for the cuff, and one for the trim that separates them. Whether you buy licensed designs like Cars® or Disney® Princesses, or just a fun fabric to match your child's room, these are sure to be a hit. (My boys are constantly fighting over the Scooby Doo® pillowcase in our house!)
Novelty Pillowcase Tutorial
What you'll need:
1/3 yard of fabric for the pillowcase cuff
1/8 yard of contrasting fabric for the trim
¾ yard of fabric for the main pillowcase body
Okay, let’s get started:
1. First, cut the cuff fabric to measure 11 inches by 42 inches.
2. Cut the trim fabric to measure 2 inches by 42 inches.
3. Cut the main body fabric to measure 27 by 42 inches.
4. Fold the trim fabric in half with the wrong sides together and iron flat.

5. Lay the cuff fabric on the table facing up.
6. Place the trim fabric on the cuff fabric by lining up the raw (cut) edges of the trim with the top edge of the cuff fabric.

7. Place the main body fabric face down on top and line the top edge with the top edge of the cuff and trim.

8. Take the bottom of the main body fabric and slowly roll it up until it is in the middle of the cuff fabric.

9. Take the bottom of the cuff fabric up and around both the body and trim fabric and line the bottom edge with the top edge of the fabric and pin into place. This will form a fabric tube.

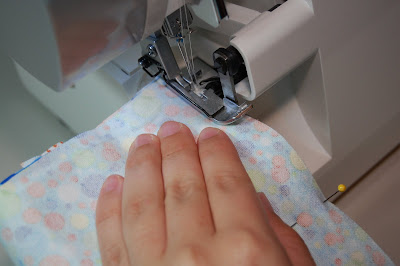
10. Sew or serge along the pinned edge.

11. Slowly pull out the rolled main body fabric and turn the cuff right side out.

12. Iron flat.
13. Fold the large piece of fabric you have now in half (so it looks like a pillowcase shape) and sew the two raw edge sides together.
14. Turn inside out.

Sweet dreams!

Mandy thank you soooo much for taking the time to be here today! I told you before but I'm gonna tell you again, I love the fact that even though Little Birdie Secrets is a "BIG" blog you don't hesitate/aren't afraid to use your blog to help out when you can! I appreciate you a ton!
And for more info on the Pillow Fight and how you can help, visit Ladybird Ln.
There will be prizes too!!!


Thank you for the great tutorial! I have been wanting to make some pillowcases.
ReplyDeleteConnie
Just a quick note to let you know that a link to this post will be placed on CraftCrave today [07 Jun 12:00am GMT]. Thanks, Maria
ReplyDeleteI would love to post this on my blog. Can I and how do I do that?
ReplyDelete